Using your Arduino to power a circuit
You can use your Arduino simply as a source of power to
the breadboard, without using the microcontroller (software)
aspect of the board. This is sometimes a convenient way to
send power to the board.
To do this, either plug your Arduino into the computer or
add an external power source via the power jack.
Connect jumper wires from the 5V and GND pins to your breadboard.
That's it!
Exercise 1: Explore Capacitors
- Build out the circuit below, using a 470 microFarad capacitor.

- Add power (and ground!) to the circuit.
- The LED should turn on.
- Remove power, and observe the LED.
-
After the capacitor reaches full capacity, it connects the circuit and power flow through.
After power is disconnected, power continues to leave the capacitor until it's empty.
Exercise 2: Explore Transistors
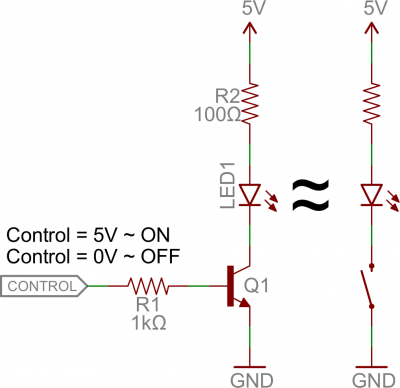
- Build out the circuit below:

Note, this is a NPN transistor.
- Add power (and ground!) to the circuit.
- The LED should turn on.
-
You've just used a transistor to turn on an LED!
This is significant, because you can use the Arduino
to in place of R1 to turn the transistor on. This circuit
is just an LED, but remember, we can put any other circuit
in place of that LED circuit. Then, when certain conditions
have been met (in software), we can use the transistor to turn
something on and off.
Exercise 3: Combine Capacitors and Transistors to make LEDs blink with no microcontroller (IE, hardware only)
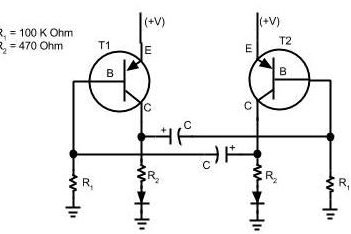
- We're going to build out the circuit specified by this diagram:

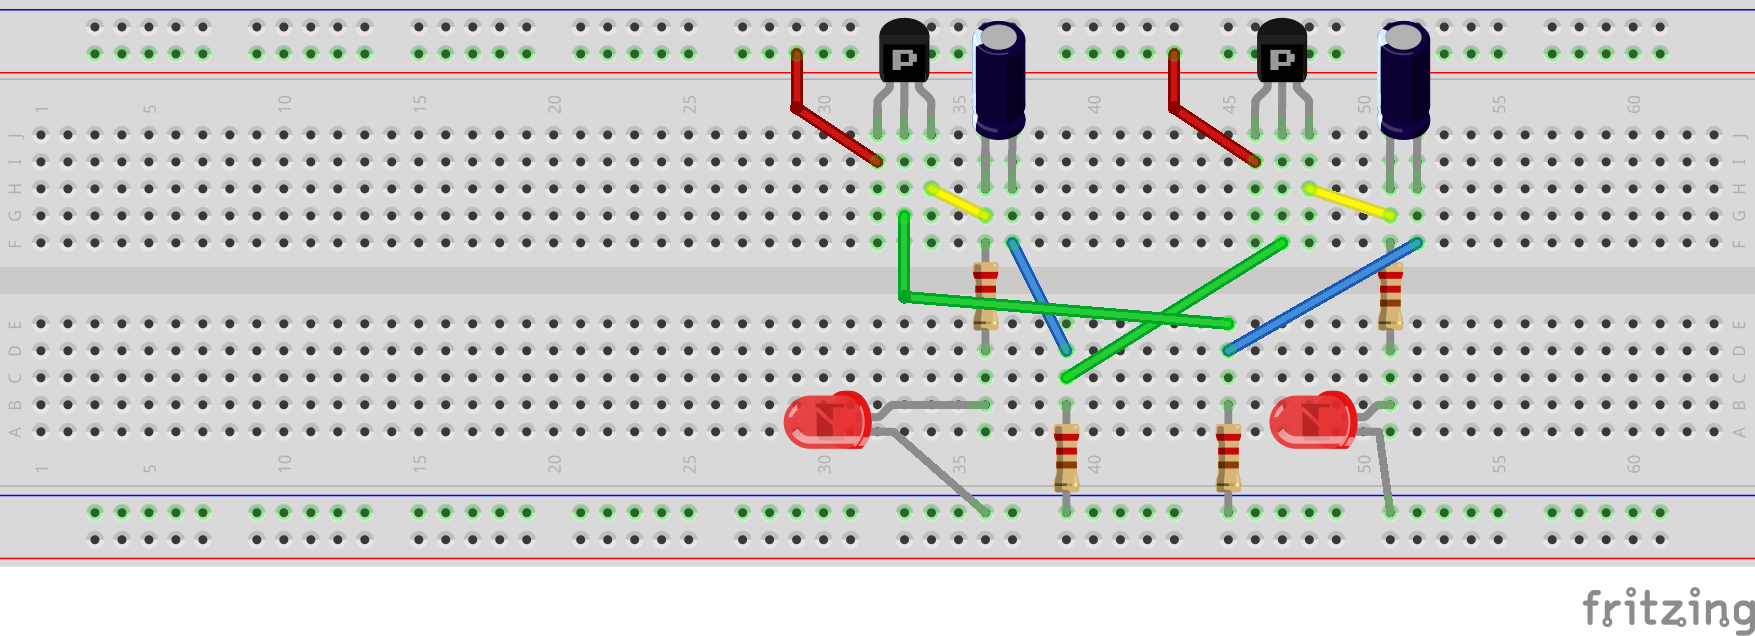
It maps to the following breadboard diagram.

Note, these are PNP transistors.
- Spend a couple of minutes convincing yourself they are the same.
- Add power (and ground!) to the circuit.
- The LEDs will blink.
-
You've just used a transistor to turn on an LED.