Lab 0: IntelliJ Setup
Starter files: code.zip
Summary
This lab covers the following topics:
Download and install the appropriate JDK version
Download and install IntelliJ
Organize and work with IntelliJ projects
Work with JUnit in IntelliJ
Incorporate code styling in IntelliJ
You can try to work through this setup lab before your scheduled lab if you like.
If you get stuck, you can ask the TAs for help in lab
—
1 Installing JDK on your computer
Note: you are welcome to play with newer features of Java on your own, but the handin server only supports Java 11, so you must ensure that your code runs correctly in that version.
In order to run/execute Java programs, the JRE (Java Runtime Environment) must be installed on your computer. In order to develop Java programs, the JDK (Java Development ToolKit) must be installed.
We will use Java 11 JDK in this course (the JRE can be 11 or later).
1.1 Checking the installed version
You can check the version installed on your machine as follows:
Open the command prompt (on Windows) or the terminal (Mac/Linux).
Type javac -version and press Enter. This checks the JDK version.
Type java -version and press Enter. This checks the JRE version.
1.2 Download and install JDK 11
Please follow these instructions:
Go to https://www.oracle.com/java/technologies/javase-downloads.html. If the link does not work, do a web search for "Java JDK downloads" and go to the oracle.com page in the results.
On that page, scroll down to find Java 11 and download the version for your operating system. (Note for Mac users: If you have a Mac with an M1 or M2 processor (i.e. model year 2020 or newer), be sure to install the amd64 version of the JDK, and not the x86 version.) If the download works, proceed to the installation steps.
If you get a 404 error or cannot download it, try the following. Return to the link above. There should be a Java archive "tab". Click on that. This will take you to a list of previous Java releases.
Make sure Java SE is selected on the left menu. On the right are a list of links. Click on Java SE 11.
Download the JDK for your operating system. (Note for Mac users: If you have a Mac with an M1 or M2 processor (i.e. model year 2020 or newer), be sure to install the amd64 version of the JDK, and not the x86 version.)
Run the installer to install JDK on your computer.
Verify the installation by checking the JDK version as described in the previous section.
2 IDE Installation
We will use Jetbrains’ IntelliJ IDEA as our integrated development environment for this course. This IDE is available in two flavors: Community Edition and Ultimate Edition. Although the latter is not free, each Northeastern student can get the Ultimate Edition for free if they use their @northeastern.edu or @husky.neu.edu accounts to register on Jetbrains website. We recommend the Ultimate Edition as it has a few plugins that you may find useful (the Community Edition should still be enough for all the work in this course).
Follow these instructions to download IntelliJ:
If you have not registered yet, use your @northeastern.edu or @husky.neu.edu account to register for a Jetbrains account. Follow the instructions in subsequent emails to complete the account creation.
Login to your account, and apply for a new student license.
Once you see the license approved in your account, you will download a specific version of IntelliJ. The reason for this is the newer versions have some bugs on newer computers (Macs specifically). Click on IntelliJ IDEA Ultimate on the license page.

Then click on the big download button to be brought to the download page. Scroll down to find Java 11.
From this new page, scroll down to version 2023.2 and download your specific version. Of note:
If you have the M1 or higher chip on a Mac (i.e. model year 2020 or newer), download the Apple Silicon version
If you have a Mac without that chip, download the macOS version
For most Windows laptops, you should be fine with the x64 version.
3 Working on projects in IntelliJ
Before starting to work in IntelliJ, the following are strongly recommended:
Create a folder somewhere on your computer that will store all your IntelliJ project folders for this course. If you are planning to use IntelliJ for several courses, group projects by course into separate folders.
Unlike Eclipse, IntelliJ does not really have the notion of a "Workspace".
Avoid using spaces in the names of IntelliJ projects. Doing so will cause bizarre, hard-to-debug errors when you least expect it.
At any point, if you encounter bizarre error messages in IntelliJ even after setting up everything (e.g. not being able to find something when it should), create a new project and transfer all your files over. This is usually much faster than trying to repair an existing project.
3.1 Creating a new project in IntelliJ
You should generally create a new project in IntelliJ for every assignment. You may group assignments into a single project if they progressively build the same program.
The instructions below create a simple project called Lab1.
Start IntelliJ.
If opening for the first time, click on New Project. If it opened the last project for you (default behavior), click on File -> New.. -> Project.

In the left side of the dialog, leave “New Project” selected.
In the top-right of the dialog, choose a Name for your project —
for example, Lab1. Make sure the name does not have any spaces, periods, or slashes in it. Just below that, choose a Location for your project —
either enter the path to, or click on the folder icon and navigate to, the folder that you created above to store all your projects for this course. For example, ~/ood. Leave the Language set to Java and the Build system set to IntelliJ —
none of the projects we work on this semester will be complicated enough to need the other options. If you have installed the Java Development Kit on your machine before installing IntelliJ, then the JDK dropdown should be pre-filled with the JDK you’ve installed. If it does not, select Add JDK, and point it to the bin/ folder of your JDK installation. You will have to do this once per JDK installed on your computer.
Leave all the other settings at their defaults, and press Create to create your project.

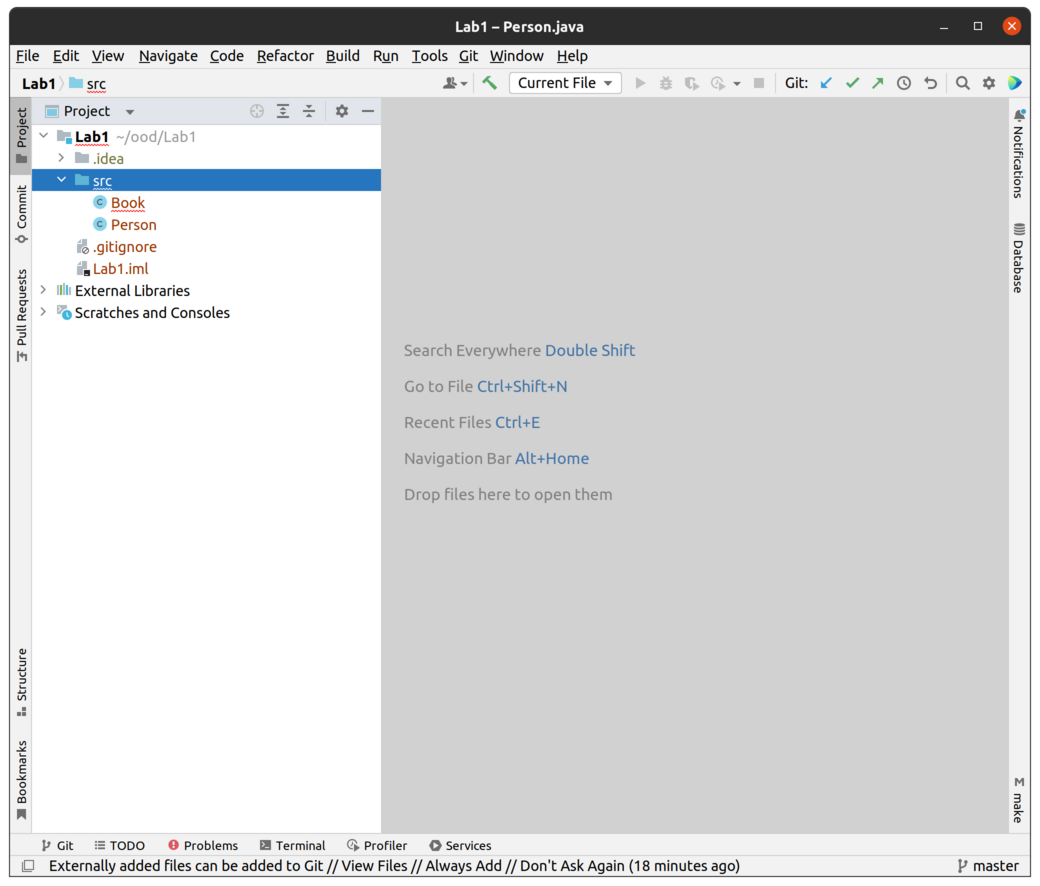
IntelliJ will create several files for you:
A .idea/ directory, that will contain IntelliJ configuration options (such as which files you have open) —
you can ignore this directory. A src/ directory, which is shown as a blue folder icon: this is the primary directory for all your source files for your project, as contrasted with all the test files that we will create later.
A .gitignore file, that will be helpful in future projects when setting up Git
A Lab1.iml file, containing build configuration settings —
do not manually edit this file, as it will usually screw up your project to the point of needing to restart it.
Once you’ve created your project, continue with the following:
Navigate to the src/ folder that was created in your project. The easiest way to do so is to right-click on the folder and choose Open in -> Files.

This will open an Explorer (if on Windows) or Finder (if on Mac) or Nautilus (if on Linux) window. Manually copy the files Person.java and Book.java to the directory. Switch back to IntelliJ, and then verify that IntelliJ shows these files in the Project Explorer pane. (You may need to right-click on the src/ directory and choose Reload from disk to refresh the project.)
Open the files in IntelliJ by double-clicking them. You will notice there are some compilation errors in one of the files.
Hover your mouse over the error line and you should see a tooltip with an error message in it. Error messages are often easier to read by clicking on the "Problems" tab at the bottom of the window.
When you hover over an error in the source file, a red bulb pops up. Clicking on the red bulb provides suggestions by IntelliJ on how to correct this error. Read and understand each suggestion before clicking on one of them —
they may make the problem go away, but not necessarily fix it! Correct the errors.
3.2 JUnit Testing
We will use the JUnit testing framework to write all our tests in this course. JUnit is not part of the JDK, and therefore is likely not installed on your computer. We will be downloading JUnit from Maven.
For each project, you should put all the tests in a separate folder. This allows you to cleanly separate your code from your tests.
In IntelliJ, right click on the project name on the left and select New -> Directory
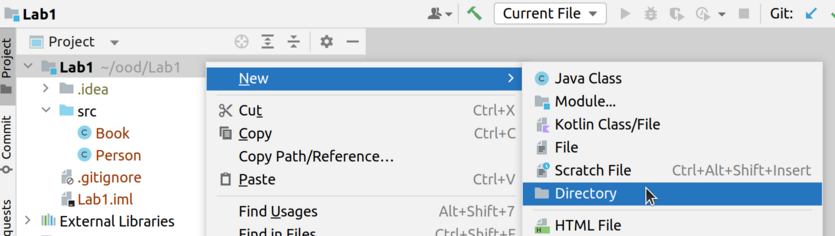
Name the folder test. Verify that the folder is shown in the project.
Right click on the test folder and select Mark Directory As -> Test Sources Root

Verify that the folder icon for test/ has turned green.
Open the Person.java file in IntelliJ.
Hover or click on the name of the class. A yellow IntelliJ bulb will appear to give suggestions. Click on it and select Create Test.
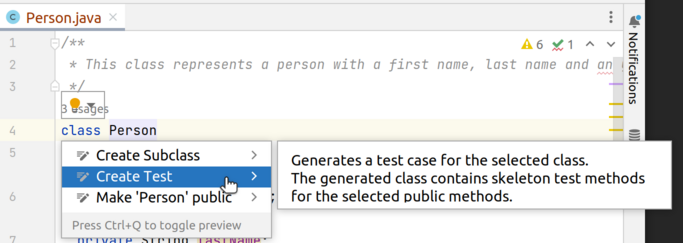
Select JUnit4 as the JUnit version to use. Leave all else to their default settings and press OK. A new file PersonTest.java will be created in the test/ folder.

The import statement in PersonTest.java will produce an error, because the IntelliJ project cannot locate JUnit files. Hover on the error, and select "Add JUnit4 to classpath" as shown.

In the popup it will ask permission to download a version of JUnit4 from the Maven repository —
make sure to choose a version at least 4.13.1 (which should be the default). Press OK. IntelliJ will now download JUnit4, put it in a folder on your computer and link your project to it. 
Verify that the error in PersonTest.java is now gone. To further confirm that JUnit has been set up correctly, go to File -> Project Structure and go to the Modules tab, and then the Dependencies tab. You should see JUnit4 as one of the dependencies:

You can exit out of this dialog without changing anything.
Copy the contents of the provided PersonTest.java file to the file you created. Now run the tests using one of the following two ways:
Click on the green double triangles next to the class declaration in the test file.
In the Project tab on the left, right-click on PersonTest.java and select Run
One of the tests will fail. This is expected. Note how it shows you the test failure.
Fix this test according to the comment next to the failure, and verify that all tests pass.
3.3 Code styling
IntelliJ can help you style your code so that it adheres to a pre-defined standard. Follow these steps to set up and use code styling:
Select File -> Settings and then on the left side, select Editor -> Code Style
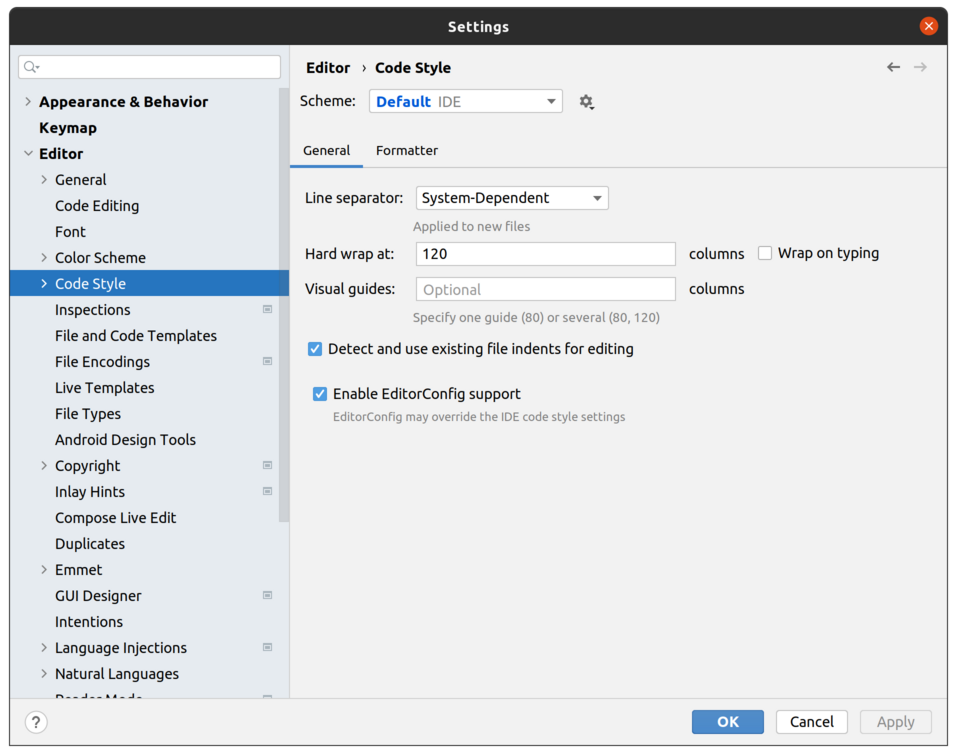
In the gear dropdown next to "Scheme", select Import Scheme -> IntelliJ IDEA code XML

In the file-chooser popup, navigate to the XML file provided in the starter code, and press OK. In the next dialog, rename the style if you wish.
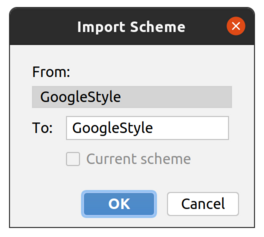
For each project, verify that this imported style is selected (you need to import only once).
To enforce this style:
Open the Person.java file. It has a style mistake: the opening brace after the class declaration is on a new line.
Select Code -> Reformat Code to fix this style error.
Repeat the same for each file in your project.
Keep in mind that IntelliJ does not automatically reformat code according to the imported style file: you must manually reformat each file. Also, the imported style file does not fix all the errors flagged by the submission server.